Nginx
📮 返回服务页
1. 安装
安装依赖:
yum install -y gcc-c++ zlib-devel openssl libtool openssl-devel
Yum 安装
安装:
yum install -y nginx
编译安装
获取
便于管理,创建一个目录改保存包:
mkdir /software/
下载 nginx 包:
前往官网下载 nginx 包,并通过 xshell、MobaXtermjian 传入服务器下的/software
Madinline version 为主线包版本
Stable version 为稳定包版本
Legacy versions 为遗留包版本
或安装 wget 工具进入/software直接拉包:
yum install -y wget
cd /software
wget http://nginx.org/download/nginx-[版本号].tar.gz
配置编译
解压/software 下的 nginx 包:
tar -xvf nginx-[版本号].tar.gz
进入解压出来的目录:
cd nginx-[版本号]
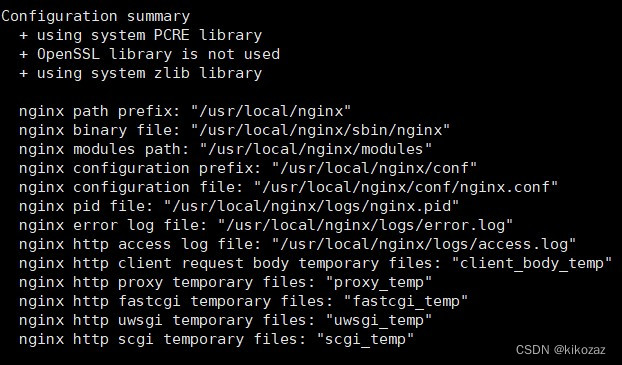
配置 nginx:
./configure
出现一下画面即成功:
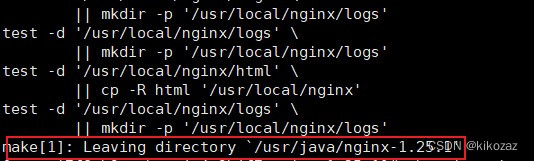
编译安装 nginx:
yum install -y make
make&&make install
此命令为编译和安装一同执行(&&),可以分开
出现一下画面即成功:
或使用如下命令检查,返回值为 0 即成功:
echo $?
2. 配置
Yum 安装
nginx默认配置位置:
/etc/nginx/conf.d/default.conf
默认wwwroot位置:
/usr/share/nginx/html
编译安装
Nginx默认的配置文件是:
/usr/local/nginx/conf/nginx.conf
进入配置文件目录:
cd /usr/local/nginx/conf
自定义配置文件(在运行前指定配置文件的路径):
cd /usr/local/nginx/sbin
./nginx -c [配置文件名].conf
跳转:配置文件介绍
3. 启动
编译安装没创建服务,执行文件在/usr/local/nginx/sbin
执行文件
进入执行文件所在的目录:
cd /usr/local/nginx/sbin
执行文件相关命令:
./nginx				//启动
./nginx -s stop		//停止
./nginx -s reload	//重新加载
./nginx -v			//查看版本
Systemctl 管理
1. 文件
源码安装的 nginx 在/etc/systemd/system/multi-user. Target. Wants/目录下是没有 nginx. Service 这个文件的,所以要新建。
创建配置文件 :
vi/vim /etc/systemd/system/nginx.service
写入 nginx. service:
[Unit]
Description=nginx - high performance web server
Documentation=http://nginx.org/en/docs/
After=network-online.target remote-fs.target nss-lookup.target
Wants=network-online.target[Service]
Type=forking
PIDFile=/usr/local/nginx/logs/nginx.pid
ExecStart=/usr/local/nginx/sbin/nginx -c /usr/local/nginx/conf/nginx.conf
ExecReload=/bin/kill -s HUP $MAINPID
ExecStop=/bin/kill -s TERM $MAINPID[Install]
WantedBy=multi-user.target
2. 启动
先设置开机自启动:
systemctl enable nginx
关闭先前启动的 nginx(如在编译完成后启动的 nginx):
kill -9 nginx
重新载入 nginx 配置文件:
systemctl daemon-reload
启动 nginx:
systemctl start nginx
3. 防火墙
开放端口:
firewall-cmd --zone=public --add-port=80/tcp --permanent
firewall-cmd --reload
关闭安全子系统:
vi /etc/sysconfig/selinux => SELINUX=disabled
or
vi /etc/selinux/config => SELINUX=disabled
setenforce 0
注:此命令将 selinux 设置成 permissive 模式,即临时关闭